The dream of building a custom computer often feels reserved for tech wizards, a complex puzzle with a high price for failure. Many imagine a mess of wires and delicate parts, where one wrong move means disaster. But what if that perception is wrong? What if the process could be broken down into simple, logical actions? That is the goal of this article. This is your all-in-one, comprehensive step by step guide to build a pc.
Together, we will turn a collection of components into a powerful, personalized machine. This is a journey to demystify PC building. Whether you’re a gamer, a creative professional, or just a curious enthusiast, you’ve found the perfect starting point. This article will be your trusted companion through every connection and every screw, making this step by step guide to build a pc an empowering and rewarding experience.
Getting Started: Preparation is Key
A successful build begins long before you touch a single component. The first phase is about preparing your workspace and gathering your tools. Rushing this initial stage is a frequent misstep that leads to avoidable frustration.
A calm, organized beginning will pay off throughout the entire process. This preparation is the true first stage in our step by step guide to build a pc.
Your Workspace and Tools
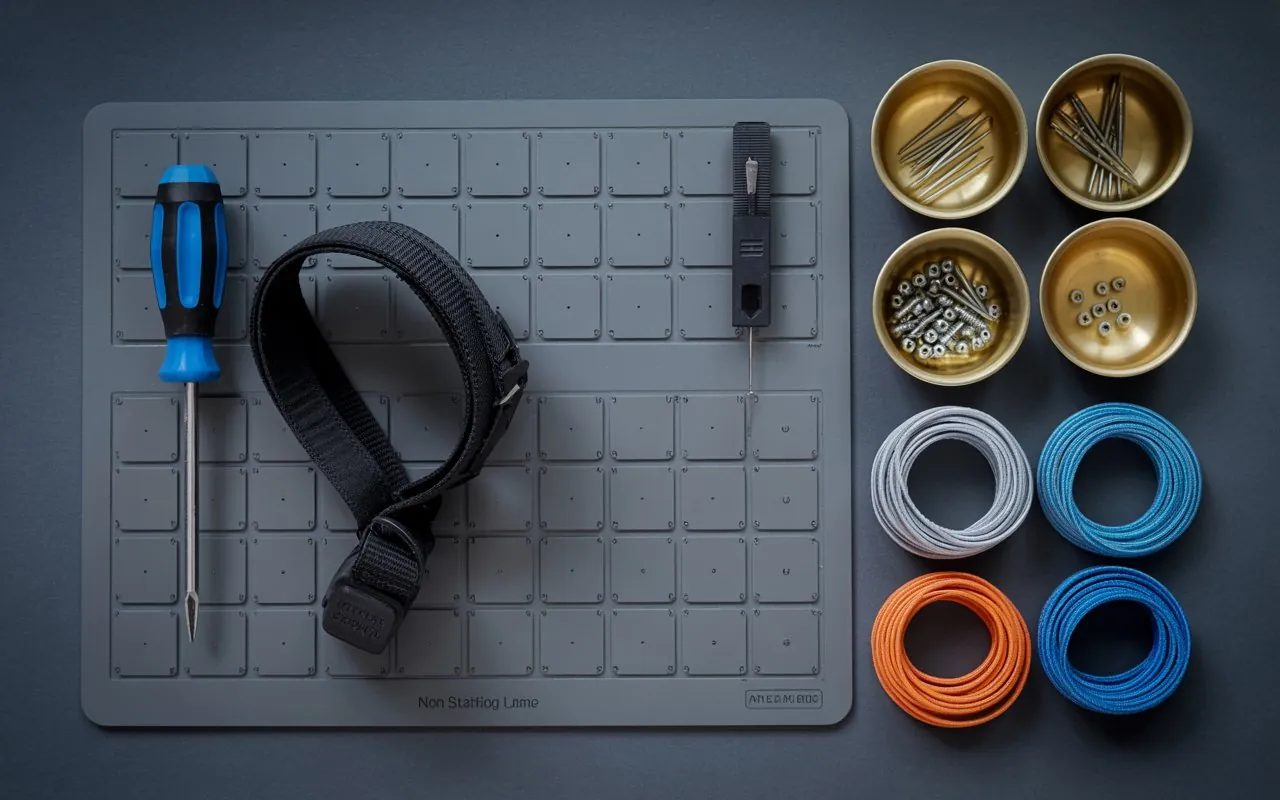
First, find a large, flat, and well-lit workspace, like a clean table. Avoid working on carpet, as static electricity can damage your components. An anti-static wrist strap is a highly recommended, inexpensive tool to keep your parts safe.
Below is a checklist of the tools and main components you will need for this project. Having everything ready before you start is a core principle of this step by step guide to build a pc.
| Category | Item | Purpose |
|---|---|---|
| Tools | Phillips Head Screwdriver | The primary tool for almost all screws. |
| Anti-Static Wrist Strap | Protects components from static discharge. | |
| Zip Ties / Velcro Straps | For clean and efficient cable management. | |
| Small Trays or Bowls | To keep different types of screws organized. | |
| Core Components | Motherboard | The main circuit board connecting everything. |
| CPU (Processor) | The “brain” of the computer. | |
| RAM (Memory) | The system’s short-term memory for active tasks. | |
| Storage (SSD/HDD) | The long-term memory for your OS and files. | |
| Graphics Card (GPU) | Renders images and video for your monitor. | |
| Power Supply Unit (PSU) | Provides power to all components. | |
| PC Case | The chassis that houses all your hardware. |
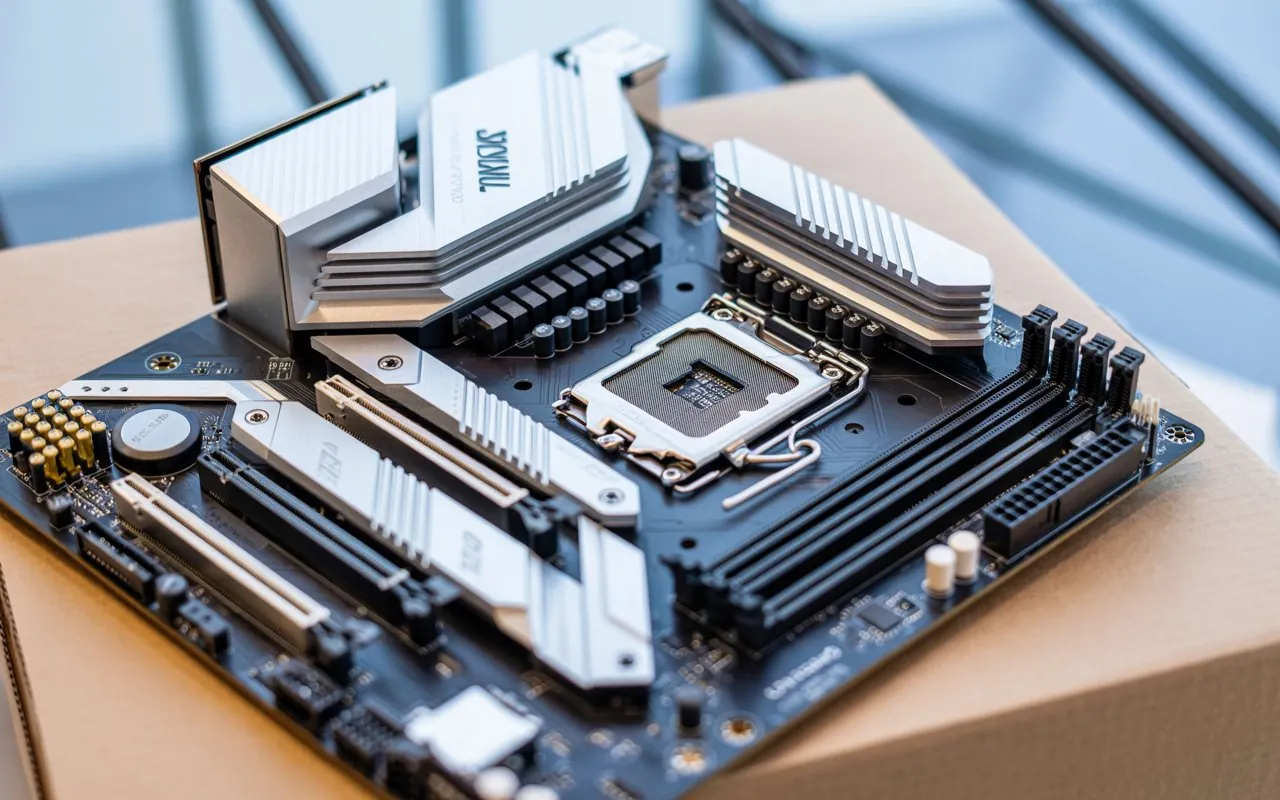
The Foundation: Pre-Assembling the Motherboard
The easiest way to begin the hands-on process is to install the core components onto the motherboard before putting it in the case. Working on an open surface is much easier than in the tight confines of the case. This is a critical pre-assembly phase of this step by step guide to build a pc.
Step 1: Install the CPU (The Brain)
This is often seen as the most delicate procedure, but it’s simple if you are careful and deliberate.
- Place your motherboard on its box. Find the CPU socket and lift the small metal retention lever to open it.
- Hold your CPU by its edges. Find the small triangle on one corner of the CPU and align it with the matching triangle on the motherboard socket.
- Gently lower the CPU into the socket. It should drop in with zero force.
- Lower the retention lever and lock it back into place. It will require some firm pressure, which is normal. The plastic cover will pop off automatically. Successfully seating the CPU is a major milestone in this step by step guide to build a pc.
Step 2: Install the M.2 SSD (If You Have One)
If you have a stick-shaped M.2 SSD for storage, installing it now is easiest.
Locate the M.2 slot on your motherboard. Insert the drive at a 30-degree angle, then gently press it down so it lies flat. Use the tiny screw that came with your motherboard to secure it in place. This is a quick win in our step by step guide to build a pc.
Step 3: Install the RAM (The Short-Term Memory)
Your RAM sticks are installed in the long slots next to the CPU.
- Open the clips on the ends of the RAM slots. Your motherboard manual will specify which slots to use first (often the 2nd and 4th from the CPU).
- Align the notch on the bottom of the RAM stick with the notch in the slot.
- Press down firmly and evenly on both ends of the stick until it clicks into place and the side clips lock automatically. That satisfying click is a key moment of progress in this step by step guide to build a pc.
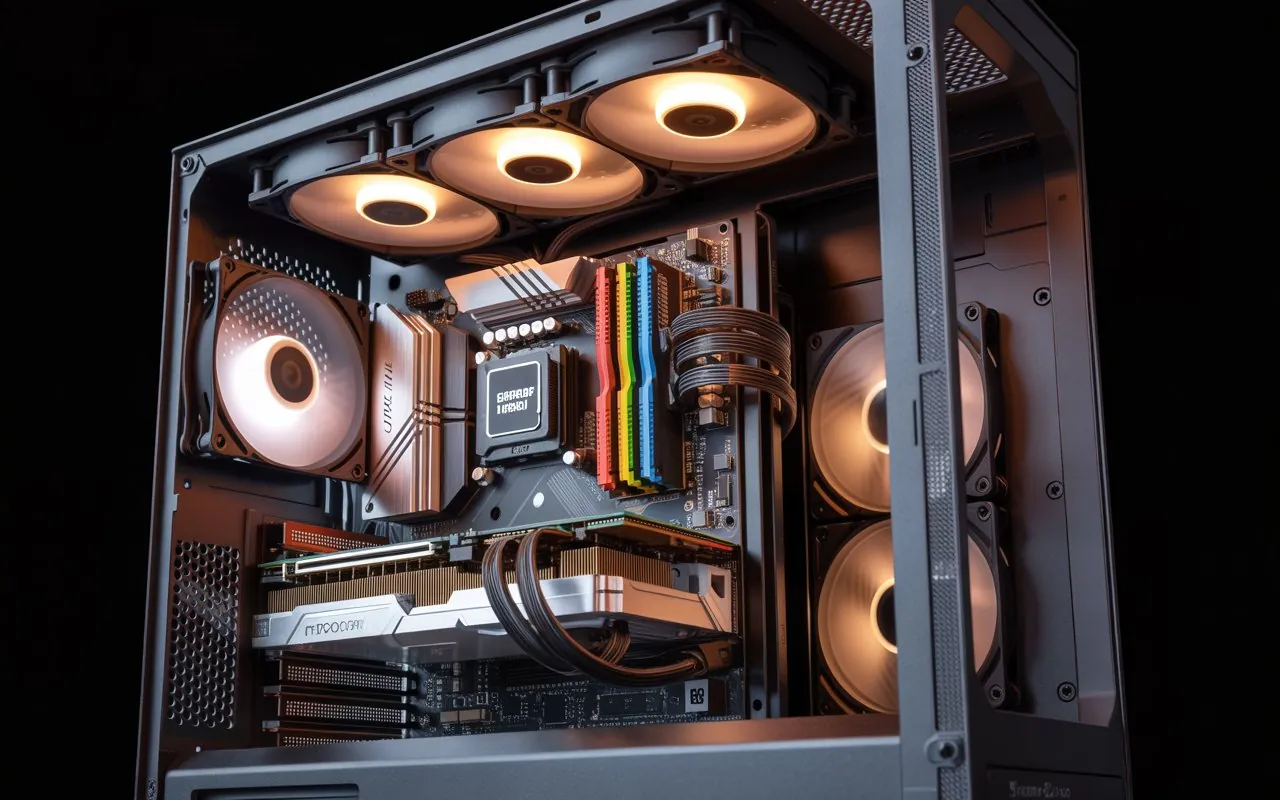
Bringing it Together: Assembly Inside the Case
With the motherboard’s core components installed, it is time to move everything into the PC case. This part of the step by step guide to build a pc is about securely mounting your hardware.
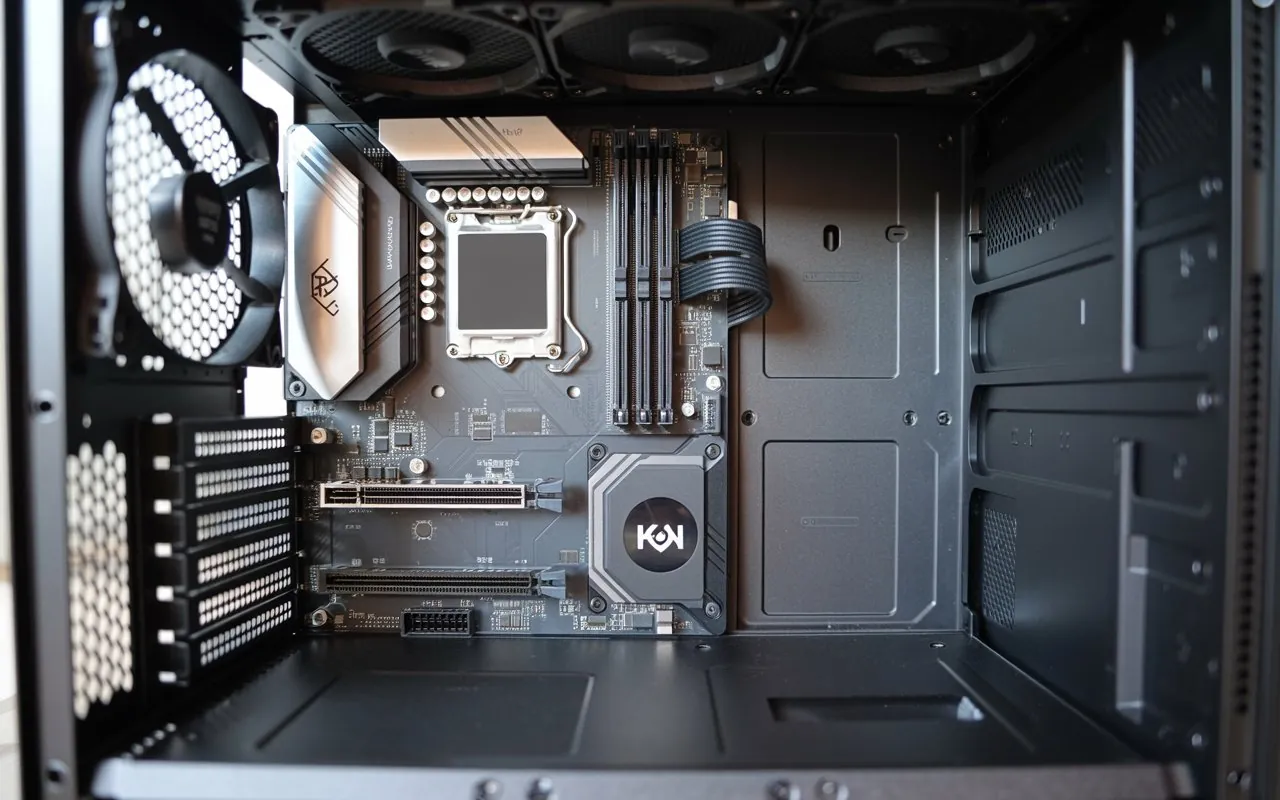
Step 4: Prepare the PC Case
First, remove both side panels from your case for maximum access. Next, you must install small screws called standoffs into the case’s motherboard tray. These prevent the motherboard from touching the metal case and shorting out. Check which holes line up with your motherboard and install a standoff in each corresponding hole. Getting this right is a fundamental rule in any step by step guide to build a pc.
Finally, find the thin metal I/O shield that came with your motherboard. Snap it into the rectangular opening on the back of your case from the inside.
Step 5: Install the Motherboard
Carefully lower your motherboard assembly into the case, aligning its holes with the standoffs. Gently slide it back so the rear ports fit snugly into the I/O shield.
Use the correct screws to secure the motherboard to the standoffs. Start with the center screw to hold it in place, then add the rest. They should be snug, but not overly tight. This is a major checkpoint in this step by step guide to build a pc.
Step 6: Install the Power Supply Unit (PSU)
The PSU is usually installed at the bottom rear of the case. If your case has vents on the bottom, install the PSU with its large fan facing down. Slide it into its bay and secure it with the four screws that came with it. This is an easy but critical step in this step by step guide to build a pc.
Step 7: Install the Graphics Card (GPU)
The graphics card is your visual powerhouse.
- Locate the top-most long PCIe slot on your motherboard.
- Remove the metal slot covers on the back of your PC case that line up with the slot.
- Open the clip at the end of the PCIe slot, align your GPU, and press it firmly into the slot until it clicks.
- Use the screws you just removed to secure the GPU’s metal bracket to the case. This is a key hardware installation in this step by step guide to build a pc.
Step 8: Install Storage Drives
If you have other storage drives, like a 2.5-inch SSD or a 3.5-inch HDD, mount them now in the dedicated drive cages or mounting points inside your case. Properly mounting all storage is a key part of this step by step guide to build a pc.
The Final Stretch: Power and Cables
This is where your pile of parts truly starts to become a unified machine. Cable management is crucial here for both looks and airflow. This wiring phase is the most intricate part of our step by step guide to build a pc.
Step 9: Connect Power Cables
Connect the main cables from your PSU to your components. The largest is the 24-pin connector for the motherboard. You will also connect the 8-pin CPU power cable near the top of the motherboard and the PCIe power cables to your graphics card. This is a non-negotiable connection in a step by step guide to build a pc.
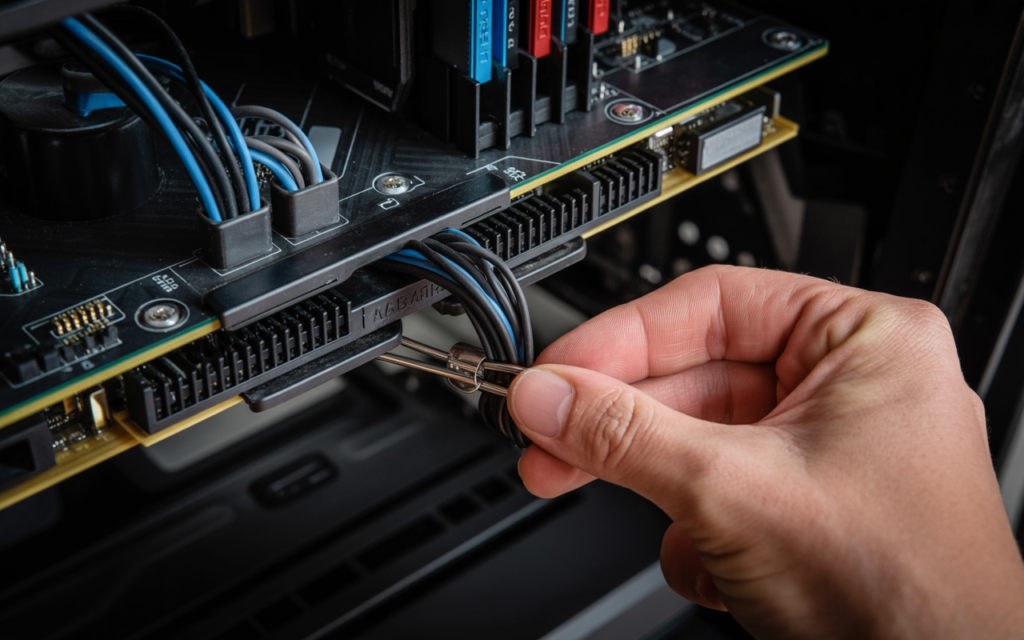
Step 10: Connect Case and Data Cables
This is often the trickiest part for beginners. You need to connect the tiny individual pins for your case’s power button, reset button, and LEDs to the front panel header on your motherboard. Your motherboard manual is essential here. Following the manual closely is a vital tip in this step by step guide to build a pc.
Step 11: Cable Management
With everything connected, route as many cables as you can through the back of the case. Use zip ties to bundle them neatly. Good cable management improves airflow, keeping your PC cool. This finishing touch separates a good build from a great one in this step by step guide to build a pc.
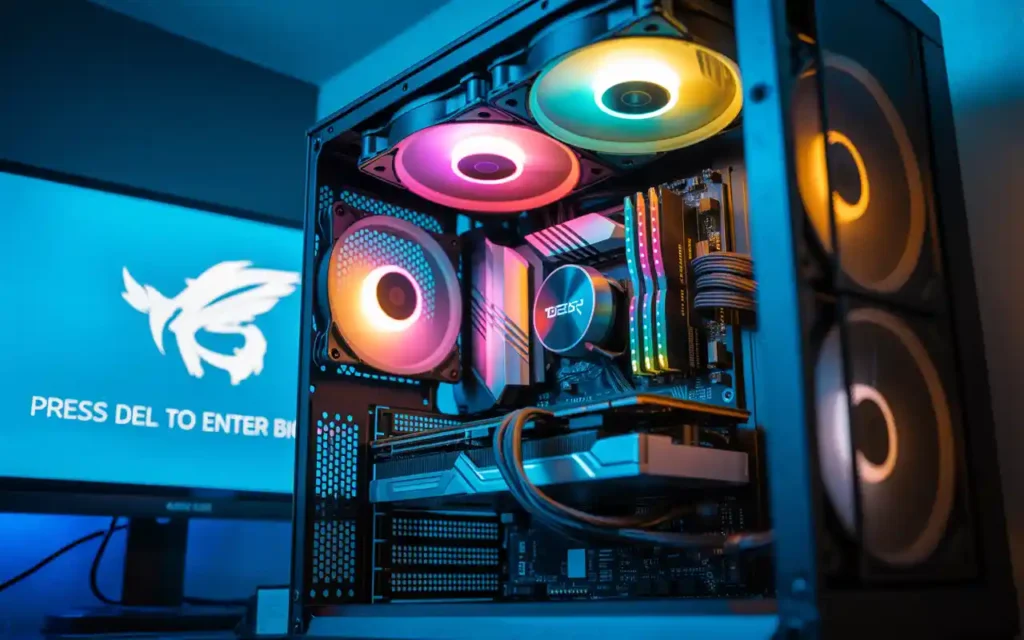
The Moment of Truth: First Boot
The physical assembly is done. It’s time to see your creation come to life. This is the most exciting part of the step by step guide to build a pc.
- Do a final visual check for stray screws or loose connections.
- Put the side panels back on the case.
- Plug in your monitor (to the graphics card, not the motherboard), keyboard, and mouse.
- Connect the power cord, flip the switch on the PSU, and press the power button.
- If all is well, fans will spin and you should see a message on screen to enter the BIOS (usually by pressing DEL or F2). If you can enter the BIOS, the hardware part of this step by step guide to build a pc is a success!
Step 12: Install Your Operating System
The final software phase completes our step by step guide to build a pc.
You will need a bootable USB drive with your chosen OS installer. Insert the USB, enter the BIOS, and set the USB drive as the first boot device. Save and exit, and your PC will restart into the OS installer. Follow the on-screen instructions, and once finished, install the necessary drivers for your hardware from the manufacturers’ websites.
Final Thoughts
Congratulations! You have successfully navigated the process and reached the end of this step by step guide to build a pc. By transforming a collection of individual parts into a fully functional computer, you have accomplished something truly special. You haven’t just assembled a machine; you’ve gained a deep, practical understanding of the technology that powers our digital world.
The machine you now have is more than just a tool—it’s a testament to your patience, your focus, and your ability to learn. It is a system built by you, for you, perfectly tailored to your needs. Be proud of what you’ve built. We hope this step by step guide to build a pc has made the process enjoyable and empowering. Enjoy your new PC and the incredible satisfaction that comes from knowing you built it with your own two hands. Remember the skills you learned in this step by step guide to build a pc; they will serve you well for future upgrades and builds.